- We began by taking a rectangle sized piece of cling film and taping round about 4 pieces of tape to it to create a stronger plastic.
- We then took a sharpie and lined it up to the models face a drew a hairline of the type of moustache we wanted to create.
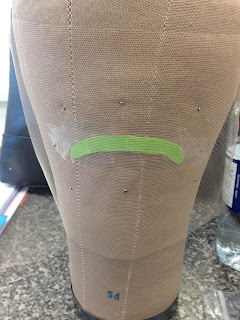
- We then took a brightly coloured piece of card (in this case green) and folded the cling film and tape template over it and cut to create a cardboard template.
- This cardboard template we had just created then gets attached to our wig head with pins.
- We then laid a piece of lace over the template and made sure the holes were lined up correctly following the lines and pinned this tightly, but not too tight in case it ripped.
- Once this foundation was created and laid we could then begin to learn how to knot onto the lace. Pav began to show us the technique in which he knots with.
- Using a hook and taking a bundle of hair we firstly pulled the hook through one of the holes in the lace making sure we went in a diagonal way to make it look like a natural hair growth pattern, I then attached one hair over the hook. I then pulled this back through the hole and using my free hand wrapped the loose hair around the hook 2 or 3 times and then pulled it through again, in turn creating a knot.
After a total of about 6-7 hours I had created and finished knotting my very first moustache. This is a lot harder then it looks and I learnt this. Its time consuming and requires a lot of patience, but in the end the result feels very rewarding. I want to hopefully create a full wig one day either being completelty lace of at least a front lace.
Here are some pictures and diagrams from this lesson.
After being taught how to knot I went on and created my moustache. Here a few pictures of it finished.
Here are pictures of the knotting process
This is the finished product, I now need to cut and style this to finish the look. I am very proud of this as my first postiche piece.
(Video taken from youtube.com - explaining how to knot hair onto lace)


No comments:
Post a Comment